Friends and Carrot and Leek Soup

Posted October 18th, 2011 in Meatless, Recipes, Soups to warm you by Rebecca Lane

I should have taken a photo – but as usual I forgot! But on Saturday we had friends from highschool Natalie and Joe stop by for the night. I spent the morning preparing by shopping at the market! As usual, I got talking with everyone and was late getting back, so I quickly put together this delicious soup. Since I haven’t given any recipes for quite some time, here you go!

Carrot and Leek Soup

1 Tbsp coconut oil
1 whole leek (clean, then slice all of the white and part of the green)
4 large carrots, peeled and cut into rounds
2 cloves garlic, minced
3 cups vegetable broth
4 cups water
2 cups dried red lentils, rinsed
1 can (14oz) of diced tomatoes, organic
1 bay leaf (or 3 small pieces in this case!)
1 tsp chevril
Pinch of pepper

Heat oil in large pot over medium heat. Add leeks, carrots and garlic and cook until soft, about 10 minutes. Add broth, water, lentils, tomatoes, spices and stir. Cover pot and bring to boil. Reduce heat and simmer for about 30 minutes until lentils are soft. Discard bay leaf and serve.

Chinatown in NYC – revisted

Posted May 26th, 2011 in Cooking classes, Meatless, Recipes, Restaurant review by Rebecca Lane

View of NYCs Chinatown

Why are you sighing you ask? I just wrote this – and hit Publish – and it disappeared!

Dragonfruit in Chinatown

Where do unpublished blog posts go I wonder? Does anyone ever see them again? Who knew that if you leave your laptop overnight and DON’T actually post your post something happens and it becomes unpublishable. Deeply saddening!

Luckily, Chinatown was not a sad place. Look at the beautiful colours and textures to the left. This is a common sight in NYCs Chinese section – and further along you find vendors selling wonderful vibrant vegetables and fruit (who can resist a pink and green dragon fruit?), origami sculptures, bonsai, and brightly coloured toys. It is one of the oldest ethnic Chinese areas outside of Asia.

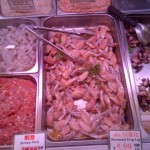
Marinated Frogs Legs

Our five hour tour started with a visit to an underground shopping mall where you could purchase any body part of an animal you can imagine. The Chinese use every part of the animal for cooking and eating – from marinated frogs legs, chicken feet, black chickens (apparently their feathers are white and fluffy, but their skin is definitely black) and all internal organs, you can purchase them here.

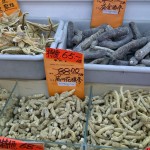
Dried starfish and sea cucumbers

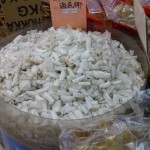
From here we found several dried goods stores where we found all kinds of things I wouldn’t even have thought could be dried – like sea cucumbers and starfish. These coconut curls though would be beautiful on a chocolate, coconut cake I’m thinking. Maybe I should come up with a recipe. No doubt the Chinatown here in TO will be able to provide the curls.

Coconut Curls

That’s one of the things I realized. We have a thriving Chinatown here in Toronto, and I never visit it. I got so many ideas for foods that I would love to try and experiment with from NYC and could probably have had the same, or a similar experience at home. So often, we get in a plane to experience something that’s in our own backyards. But it takes a plane ride for us to see it!

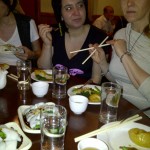
Vegetarian Dim Sum

The group experienced Vegetarian Dim Sum together. I’m not certain that I would do it again. I’ve had Dim Sum before and have a texture problem with the custard like quality of the food. Don’t get me wrong, I LOVE custard – but not when it’s made with rice flour and warm and gelatinous and a little greasy.

After spending the morning and the early afternoon experiencing the sights, sounds, smells and tastes of Chinatown, we walked across Canal Street to Little Italy. It may only be one street long, but there’s lots of Italian flavour let me tell you – and amazing that it’s just across the street from Chinatown!

Cannoli - first taste

Sherri tried her first Cannoli and we found a little Italian restaurant that served delicious pizza – fresh tomatoes, mozzarella cheese and basil. Ohhh – it was so good. It could have been made more delicious by the margaritas that were served along with the pizza? And the umbrella protecting us from the rain? And the good-looking Italian men in the restaurant? Nah – it was tasty. Sometimes the really simple recipes are the best. Once recipes get too complex, the flavour gets lost.

Here is where we started walking – after we found a restroom, which is not an easy task in Little Italy! We walked to Soho in search of a store selling Doc Marten’s for Sherri – at Spring and Green. Next time I come to NYC, I’m starting my shopping here. It’s so pretty with lots of tiny little one-of-a-kind boutiques that I would love to have browsed through. Unfortunately we had dinner reservations so had to keep moving.

Those reservations were being held at Blossom of NYC. Weary and wet again – we picked a rainy weekend to discover the joys of New York – I had a delicious mixed field greens salad with a sweet potato filled ravioli topped with pine nuts. This meal was made even better by its proximity to Cocoa V where we went for dessert – lots of decadent chocolate. Who could ask for more? Oh yes – it was close to our hotel!

Our last day was Sunday – so we needed a great Sunday brunch spot and found that Sarabeth‘s at Central Park South is THE place to be in New York City for brunch. After a decidedly fluffy breakfast of eggs and scones – and delicious jam I might add – we went for a walk through Central Park and along 5th Avenue. Before we knew it, it was time to fly home to beautiful TO.

Until we return NYC and Natural Gourmet Institute.

Here’s the recipe for the Homemade Ricotta we stuffed the Ravioli with –

Homemade Ricotta (makes 1 quart)

1 gallon whole milk
1 cup heavy cream (not ultra pasteurized)
2 tsps salt
1/2 cup fresh lemon juice

In a large pot (one gallon large), heat the milk and cream to 100°F. Add the salt and continue heating, stirring occasionally to prevent scorching, until an instant read thermometer reads 185°F.

Add the lemon juice and gently stir. The lemon juice causes the milk to separate. Reduce heat to really low and cook until curds form (about 1 minute). Do not let mixture come to a boil. Remove from heat and let stand for 5 minutes.

Line a sieve in a bowl with damp cheesecloth and gently ladle curds into the cloth, letting it drain for an hour. The longer it sits, the harder it becomes. Transfer to container and refrigerate. Will keep for up to 5 days.


NYC and the Natural Gourmet Institute

Posted May 23rd, 2011 in Cooking classes, Grains, Meatless, Recipes, Restaurant review by Rebecca Lane

We had a wonderful, whirlwind tour of NYC this weekend that included a Pasta cooking class at Natural Gourmet Institute and a walking (and eating) tour of Chinatown. I’ve got lots of photos and a recipe to follow – but first the details!

Sherri & Pina at Xai Xai, a South African Restaurant

Before we begin, I want to apologize for the fact that there are no photos of me. It seems that if you remember to bring a camera, then you become the biographer rather than the subject of the biography! Anyway, there are very few photos of me because I often remember my camera! Enough said.

We arrived in NYC on Thursday afternoon and spent the afternoon walking toward the Theatre District and visited Times Square (this was quite a hike from our hotel at W 29th and 7th Avenue – the Holiday Inn Express). About 5 o’clock in the afternoon we walked by the sign for Wicked and decided that we would try and get cancelled tickets. We quickly managed to get 2 tickets but were waiting on a 3rd when something wonderful happened. There was a lottery called for 13 spots in the front row! Who knew? So Sherri and I left Pina in the line-up and put our names in the lottery along with 100s of other people. There were a lot of people trying to get these tickets! Anyway, I won a ticket and for $26.25 I was able to watch ‘Wicked’ from the front row.

To celebrate, we walked down to Xia Xia, a South African restaurant for a Margaritta (I know, you don’t usually associate the two – but they were on sale for $4 there and we couldn’t resist). Along with the delicious margarittas, we tried Goat Cheese Stuffed Pepperdaw Peppers which are delicious mildly spicy peppers from South Africa. Got to try and find them here – does anyone know where I might find them in Toronto?

With the pepperdaws, we had Oven-roasted Asparagus with Melted Brie in an Orange Honey sauce. I’m thinking that the name should say it all.  It was fabulous. Melted brie topped with asparagus tips served with an orange-honey sauce that would have been even better if the orange was a stronger flavour. When I try it at home, I think that I’ll try zesting some of the rind to punch up the flavour.

The next day was Friday, and we spent the day shopping. It rained all day so we literally ducked from one store into the next. But a few shoes managed to find their way into my suitcase as well as a raincoat and matching scarf. Our destination for lunch was Angelica’s Kitchen on E 12th street. I can’t remember what we ate exactly as I didn’t take notes nor did I take photos (hey, it was raining, we walked many, many miles and my feet were wet and blistered – I was not in my happy place!). We started with the soup of the day which was potato and leek with an arugula sauce on the top. It was a beautiful white soup with a swirl of green on the top. After that, we asked the waiter for help (I think we were all in the same ‘gloomy cloud’ place and so hungry and thirsty we couldn’t really make decisions) and he suggested that we try the Pantry Plate with hummus, a simple salad, and garlic lemon marinated kale. It was tasty – to finish off the hummus we tried some of their Sourdough bread which was a good idea as we didn’t want to waste any!

By this time we needed to head back to the hotel and dry off before our Pasta class. I have to admit that I was feeling so exhausted that the idea of standing for the next 4 hours filled me with dread. Yeah – I had come all of this way for this one class and I just wanted to go to bed with my feet suspended high above me. And I thought those boots were made for walking!

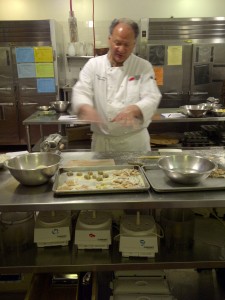
Chef Richard LaMarita demonstrating how to make pasta

Despite my trepidations and my aching feet, off we marched to the Natural Gourmet Institute to learn how to make pasta. And let me tell you that I’m really glad that I did. We had a blast! Chef Richard LaMarita was so knowledgeable, not just about the food but he had learned how to make it by traveling around the area and learned from the locals. Can you imagine? I would so love to do that! Look out world, I’m going to join the ranks of traveling food writers! I just want to eat everywhere really.

Here’s a shot of Richard showing how to make the pasta and get it ready for cooking. Note how his hands are blurred? That’s because he talks with his hands too!

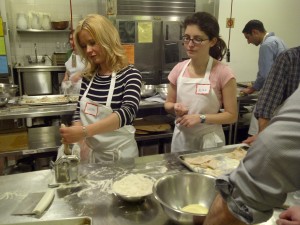
Sherri rolling out the dough for Pappardelle pasta

We made delicious sauces too, then came the exciting phase – rolling out the pasta dough! Here’s Sherri showing you excellent technique! That’s Aliza helping out because Sous-chef Rebecca chose this moment to take some photos. She and Daniel worked on the same recipes as we did – so we were a little competitive. Thanks for the ribbing you two!

Enough writing for today. All these food ideas has made me hungry so I need to go and think about what’s for supper. I’ll tell you all about Chinatown and Blossom tomorrow. This way you’ll get two recipes instead of just one!

This was our favourite recipe – Rye Gnocchi with Sage Butter with grateful thanks for sharing it with us to Natural Gourmet Institute and Chef Richard.

Rye Gnocchi with Sage Butter

Gnocchi

2 lbs baking potatoes (about 4), washed
kosher salt to sprinkle on baking sheet
2 egg yolks, beaten
1 tsp salt
1/4 tsp black pepper
1 tsp ground caraway seed
1/2 to 1 cup rye flour (+ 2 Tbsp for dusting baking sheet)

Sauce

6 Tbsp unsalted butter
1/4 cup fresh sage leaves, chiffonade (plus 6 whole for garnish)
salt and black pepper to taste
1/4 cup parmesan cheese

  1. Preheat oven to 400°F. Pierce the potatoes all over with a fork and place on a baking sheet covered with kosher salt (you want the potatoes to dry out, so cover the pan well to absorb all of the moisture). Bake potatoes for 1 hour, or until for tender. Set aside to cool until warm, not hot.
  2. While the potatoes are still warm, scoop out flesh from the skin. Pass them through a ricer and place in a bowl. Be sure to keep the potatoes as light and fluffy as possible, ensuring a light gnocchi.
  3. Add the egg yolks, salt, pepper, ground caraway seed and just enough flour to create the dough. Do not overwork it, add just enough flour to make it come together. Do not knead. Cut the dough in half and roll into cords about 1.5″ thick. Cut off pieces about 3/4″ long with a pastry knife. Set aside on a baking sheet sprinkled with rye flour. Gnocchi can be frozen at this point.
  4. Place the gnocchi into boiling, salted water. Cook until they float and start to swell slightly (about 1 minute after they float to the surface). Undercooking the gnocchi will make them heavy. Overcooking them will make them tough.
  5. While gnocchi are cooking, melt the butter in a pan just until it begins to brown. Quickly take the pan off the heat and toss in the sage leaves. Season with salt and pepper. Take gnocchi out of the water (we used a large spider scieve) and place right into sauce in pan. Toss to fully coat. Serve sprinkled with parmesan cheese and garnished with sage leaves.

Trip to NYC to visit the Natural Gourmet Institute

Posted May 18th, 2011 in Cooking classes, Fish, Meatless, Recipes by Rebecca Lane

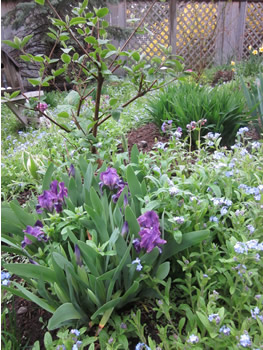
My garden after the rain

Tomorrow morning I’m off to New York City to take some classes at the Natural Gourmet Institute. I’m going with Sherri Doak and Pina Constantinos from Nature’s Emporium and we look forward to learning how to make some delicious food as well as visit some of the places we’ve been reading about. Saturday night we’ll be eating at the raw food restaurant Pure Food and Wine. I promise to post lots of details and will take some photographs too (but for now, here’s a photo of my post rain flower-filled garden).

We were disappointed to find out that tomorrow night’s class has been cancelled due to lack of enrollment. Too bad – NYC is missing out on some serious information about Spices, the key to a delicious meal in my opinion. Hopefully we will be able to attend the Seitan class instead but there is a waiting list. Failing that, I’m certain that we’ll find something to see and eat in New York! Who knows, we might even be able to do some shopping too!

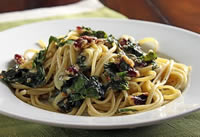
Last night we went out for supper to celebrate my daughter’s passing her driving test. She wanted to celebrate – I needed a drink!! There are some delicious vegetarian options available at restaurants now – even the Roadhouse style restaurant. I found a tasty whole wheat pasta dish with spinach, roasted red peppers and tomatoes – Tuscan Linguini I think it was called. But there were also plenty of salad options too.

Supper tonight will be left-over Asian Coleslaw (recipe yesterday) with a Rice Bowl from Refresh cookbook. Here’s the recipe for Dragon Rice Bowl (it calles for Tofu, I’ll be using shrimp instead).

1 large zucchini, sliced diagonally
3 tomatoes, sliced thickly
12 shrimp, peeled and deveined
6 cups cooked brown basmati rice (per package directions – use a little vegetable stock to replace some water for more flavour)
1 batch Tamari gravy (follows)
1 bunch cilantro, chopped (I prefer parsley)
1 bunch green onions, chopped (chives from the garden will replace)
2 Tbsp toasted sesame seeds

Grill the zucchini, tomatoes and shrimp in the oven (or on the BBQ) at medium to high heat, until lightly browned.

Put 1.5 cups brown basmati rice in each bowl. Pour 1/4 of the Tamari Gravy on top of the rice.

Divide the grilled veggies and shrimp into 4 and put on top or beside the rice. Garnish with cilantro (parsley), green onions (chives) and sprinkle with toasted sesame seeds.

Tamari Gravy (from Enlightened Eating by Caroline Dupont)

1 Tbsp olive oil
1 Tbsp butter
4 Tbsp spelt flour (or rice flour if going gluten-free)
2 cups water
3 Tbsp tamari

Gently heat butter and oil over medium heat. Slowly stir in flour until a smooth paste is formed. Cook for 1 minute stirring constantly.

Still stirring, add water little by little, to form a smooth thick sauce – I use a whisk to help with this stage.

Add tamari, still stirring constantly. You may need to add a little more water to achieve desired thickness. But this usually takes a few minutes (1-2 minutes depending on the flour used) after the gravy has come to a boil for the flour to thicken to the desired consistency.


Day 25 – Crackers and bean spread, fast and delicious

Posted April 26th, 2011 in Gluten-Free Flours, Grains, Meatless, Recipes by Rebecca Lane

You can make a delicious bean spread from any beans you have available. And they only take a few minutes to put together. If you use canned beans, choose unsalted, organic brands like Eden Organic.

The main components of a bean spread are:

  • beans – what you have cooked, or in your pantry
  • nut butter – tahini, almond nut butter
  • olive oil
  • garlic – my personal opinion is that you can never have too much garlic as long as your partner has some too!
  • seasoning – herbs and spices that compliment the beans you have on hand and the vegetables you choose to add – this is where you need to know what tastes good with what, or you can go online and research what combinations have already been tried
  • salt
  • lemon juice
  • vegetables – this is where I use up leftovers, especially slow roasted sweet potatoes, squash, red peppers or eggplant

Great Northern Bean & Roasted Sweet Potato Spread

Yes, that’s what we had in the fridge and pantry to go with the Arrowroot crackers we were experimenting with. Oh, that’s how this all started. Sherri and I were starting to go through the recipes we’re compiling for the Holistic Cooking Academy (moving in upstairs at Nature’s Emporium soon) and we found the recipe for Arrowroot Crackers that follows. Since you HAVE to have a delicious spread to cover such wonder, we whipped this up for you.

1 can                            Great Northern Bean (Eden brand)
2 Tbsp                          tahini
2 Tbsp                          olive oil
2 Tbsp                          water
1 clove                         garlic

½ cup                           roasted sweet potatoes (skins removed)
1 tsp                             curry powder
½ tsp                            kelp salt
½ tsp                            paprika
½ tsp                            cumin 

  1. In a food processor, combine the first 5 ingredients until they reach the desired consistency of a bean spread (thick – but not too thick because it will break your crackers!).
  2. Add second group of 6 ingredients and process until smooth.
  3. Enjoy with some delicious crackers – like the Arrowroot crackers.

Sherri Doak and I will be teaching how to make the following Gluten-Free Arrowroot crackers in the Gluten-Free Baking class in September at Nature’s Emporium.  But until then, you can try them out yourself. Here’s the recipe.

Arrowroot Crackers

1 tbsp ghee or clarified butter
1/2 cup light bean flour (like chick pea)
1½ cups arrowroot flour
1 cup  almond meal
2 tsp baking powder
1 tsp  salt with trace minerals
¾ cup purified water – warm
1 tbsp. honey
1 tsp  thyme
½ tsp  basil

Parchment paper
1 egg
1 tsp toasted sesame seeds or black onion seed
½ tsp dulse

 1.  Prepare the batter. Melt butter in a small dish in a low oven. In a medium-sized mixing bowl, mix flours, almond meal, baking powder, thyme, basil and salt. Mix warm water and honey and add to dry ingredients. Add melted butter, and stir, and then mix gently to form moist dough. Turn on oven to 300° F.
2.  Create the cracker. Place parchment paper onto a large bar pan. Press and stretch dough with your fingers into the pan, until dough is very thin – about 1/16th-of-an-inch. Roll with a small roller to help make it smooth. Glaze with a beaten egg, and evenly sprinkle on seeds and dulse. Cut five rows down and eight rows across to make 40 squares. Prick with fork to prevent bubbling.
3.  Bake 30 minutes or until crackers are crisp. Cool on a rack, and then lift parchment paper to slide crackers to a serving dish. Serve with your favorite  bean spread.
4.  Store in an airtight container, or in a tin with waxed paper, and refrigerate.

Hope you enjoy whipping up your own bean spreads with what you have in the pantry and frig!

Incoming search terms:

  • arrowroot crackers

Day 24 – Cooking with my Daughter

Posted April 25th, 2011 in Grains, Meatless, Recipes by Rebecca Lane

Walnuts, Swiss Chard & Port-Salute cheese with Noodles

Today is a very special day. For the first time in recent memory (we used to bake together often when she was younger), my teenager suggested that she make supper tonight. Who ever heard of such a thing?

And to make it even more exciting, she went exploring online and came up with a recipe that we made. Now, I’m going to come up with some suggestions to make it even better.

The original recipe came from Saveur but we’re adapting it.

Walnuts, Red Swiss Chard and Port-Salute Cheese on Soba Noodles
Serves 4

1 cup shelledwalnut pieces – with spices and maple syrup

  • 1/4 cup chili powder
    2 Tbsp sea salt
    1 Tbsp ground cumin
    1 Tbsp paprika
    1 Tbsp coriander
    1 Tbsp pepper
    1 tsp cinnamon
  • Mix the spices together and keep – makes enough for 5 batches of the roasted nuts
  • 2 Tbsp maple syrup
  • Roast walnuts in a single layer (on parchment paper) on a cookie sheet at 300°F for 20 minutes. Remove from oven and sprinkle with spice mixture and maple syrup. Stir thoroughly. Return to hot oven and let absorb liquid and dry the nuts – another 10 minutes.

1 bunch red swiss chard
2 Tbsp walnut oil
2 shallots, peeled and minced
3 large cloves garlic, peeled and minced
Zest of one lemon (save a little for garnish)
1/4 cup vegetable stock
Dulse and Freshly ground black pepper
8 oz Soba Noodles
4 oz Port-Salute cheese or other semi-soft cheese cut up into bits (you will need to refrigerate it in order to cut it up)

Trim swiss chard leaves, discarding tough stems. Chop coarsley and set aside.

Heat walnut oil in a medium skillet over medium-low heat. Add shallots and garlic and cook until shallots are soft, stirring occasionally – about 7 minutes. Add the vegetable stock, lemon zest and swiss chard, season with dulse and pepper – cover and allow to wilt – about 5 minutes.

At the same time, cook the soba noodles in a large pot of boiling salted water for 8 minutes. Drain and return to pot. Stir in cheese and walnuts.

To serve, put pasta on a platter with the swiss chard, garlic and shallots on top. Garnish with a few of the toasted, spiced walnuts on top along with  lemon zest.

The Port-Salute cheese is very creamy and quiet. You could use any other semisoft cheese that you have on hand – one with more flavour might be nice to compliment the bitterness of the swiss chard.


I use the nut spice for walnuts and more often pecans. I keep the spiced nuts for a week in a mason jar – they don’t seem to last longer than that as they can be added to spice up a salad, a noodle bowl, pad thai – you name it, they make it taste better. At Christmas, you can even make up jars as presents for your friends.

Day 22 – Cooking for the Rushed

Posted April 20th, 2011 in Meatless, Recipes by Rebecca Lane

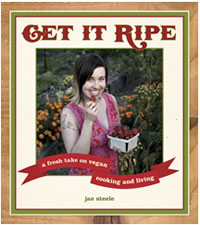
Get it Ripe by jae steele

Tonight has been one of those ‘taxi-service’ nights. Since 3:30 I have been ferrying children from one thing to the next. My husband is out of the country and I’m alone at home at dinner time. Sound familiar? When they finally get home they are going to be STARVING, but right now all is calm in the house.

So I’ve pulled out one of my old faithfuls from the freezer and am cooking up some Soba Noodles (buckwheat noodles – so tasty) and home-made vegan spaghetti sauce courtesy of Jae Steele’s book “Get it Ripe“. You can also serve it over roasted Spaghetti Squash which is delicious and top with nutritional yeast. I’ll include the directions for that in case you want to try.

If you want to make yesterday’s lasagna go further (and I did this), for the bottom layer you could use this sauce with a layer of baby spinach over top, then start with the cream sauce. The two sauces are delicious together and combine to make a rose.

Vegetable Tomato Sauce (from page 188, Get it Ripe)
3 Tbsp olive oil
2 medium onions
2 large cloves garlic, minced
8 oz mushrooms, slices
1 bell pepper, chopped
1 medium zucchini, chopped
1 28-oz can crushed tomatoes
1 Tbsp fresh oregano
1 Tbsp fresh basil
1 Tbsp fresh rosemary
1 tsp sea salt

Heat oil in a 3-qt saucepan on medium heat. Add the onions and saute for about 8 minutes until softened and fragrant. Add garlic and mushrooms and saute for another 5 minutes. Add the bell pepper and zucchini and saute for another 5 minutes (I sometimes add grated carrots too to sweeten it up).

Pour in crushed tomatoes and reduce heat to simmer. Stir in fresh herbs and salt and simmer for 20 to 60 minutes – the longer the better the flavours mix together.

You can make the tomato sauce as the Spaghetti Squash is roasting. Cut squash in half, scrape out seeds and pulp and discard (or separate the seeds and toss them with salt and roast in a separate pan until golden). Place cut side down on a piece of parchment paper. Trust me you want the parchment paper, or you’ll be making a trip to buy another baking pan (I know from experience)! Roast for about 40 minutes at 375°F. You can rub 1 Tbsp of oil over the squash but not necessary.

Remove from the oven and let cool just a bit. Then, holding the squash in your oven mit covered hand, take a fork and scoop flesh into a colander to drain. 

Serve the squash covered with the tomato sauce and garnish with Parmesan cheese or nutritional yeast and fresh pepper.  A caesar salad would be a tasty side dish to accompany this salad.

I find that this is enough for two days – I serve half the first day and pour the rest into a mason jar to freeze for another day. My family likes it best if I puree the sauce so there are no “chunks” – you may be able to get away with the chunks!

Day 20 – Time to start something New!

Posted April 18th, 2011 in Meatless, Recipes by Rebecca Lane

Well, this point came much sooner than I had anticipated. I’ve already shared all of my family’s favourite meals, so now I have to start trying new recipes. This is good for me – stepping out of my comfort zone for the next 10 days could have some interesting results. Hopefully my family will like SOME of my creations!

To make things even more interesting, I purchased a Vita-Mix today and should be really shaking things up in the juicing department as soon as I can figure out how to set it up. Refresh cookbook has lots of ideas for juice combinations which I will be trying out over the next couple of days. Will keep you informed on how I sneak in kefir, protein powder, spirulina and other great healing aids – and what the family thinks of these healthy green drinks. Failing everything else, at least I will be eating well – because my taste buds seem to be much more interested in trying out new flavours than my teens.

So, what’s for dinner tonight you ask? Are you ready – cause it’s pretty exciting!

From the cookbook, Vegetarian Cooking for Everyone by Deborah Madison, we’re trying the Winter Squash Galette with a yeasted tart dough. It will be accompanied by a kale salad with mango (sweet flavours to compliment the squash) and a Quinoa with red peppers, leeks and carrots. I have a couple of hockey boys sleeping over tonight so I need filler food! I’ve also got a couple of steaks to BBQ in case they’re still starving.

Yeasted Tart Dough with Olive Oil

2 tsps active dry yeast
1/2 tsp sugar
1/2 cup warm water
3 Tbsp olive oil
1 egg, lightly beaten
3/8 tsp salt (have you ever heard of such a thing? I didn’t realize that I had a 1/8th tsp measure)
1 3/4 cup flour, as needed (I’m using whole spelt flour tonight)

Dissolve the yeast and sugar in the water in a medium bowl and let stand until bubbly, about 10 minutes. Add the oil, egg and salt, then stir in flour. When the dough is too stiff to work with a spoon, turn it onto the counter and knead until smooth and elastic, about 4 minutes.

Add more flour if necessary to keep it from sticking.

Set the dough in an oiled bowl, turn it over to coat, cover with a damp towel and let rise until doubled in bulk, 45 minutes to 1 hour.

Winter Squash Galette

Yeasted Tart Dough recipe
2 1/2 lbs winter squash (I used butternut)
1 small head garlic, cloves separated but not peeled
1 Tbsp olive oil, plus extra for the squash
1 onion, finely diced
12 fresh sage leaves, chopped, or 2 tsp dried
1/2 cup freshly grated parmesan cheese
Salt and freshly milled pepper
1 egg, beaten

Make the dough. Preheat the oven to 375°F. Cut the squash in half, scrape out the seeds, and brush the surface with oil. Stuff the garlic into the cavities and place the squash cut side down on parchment lined sheet. Bake until flesh is tender, about 40 minutes. Scoop out the squash and squeeze the garlic cloves. Mash them together with a fork until fairly smooth, leaving some texture.

Warm 1 Tbsp oil in skilled over medium heat. Add the onion, and sage and cook until onion is soft and beginning to colour about 12 minutes. Add it to the squash with the grated cheese and season with salt and pepper.

Roll out dough into 14-inch circle and spread the filling over it, leaving a border of 2 inches or more. Pleat the dough over the filling, then brush the edges with beaten egg. Bake until the crust is golden, about 25 minutes.

I think this will be delicious with the salad. I’ll definitely add some maple syrup to the dressing and will make the salad while the squash is roasting so it can marinate for at least 2 hours.

NOTE: After making this tart, I suggest that you roll it out on either the cookie sheet or pizza stone that you intend to bake it on. It is impossible to move when full. Another suggestion – to make this tart faster, you could use a phyllo pastry crust. This crust is quite doughy, more like a pizza crust.

Day 18 – the final 3 detox pathways

Posted April 16th, 2011 in Detoxification, Meatless, Recipes by Rebecca Lane

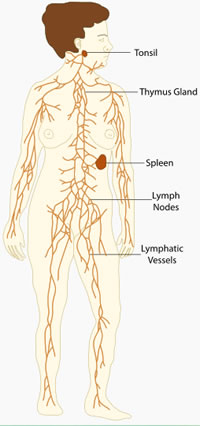
Lymphatic System

Yesterday didn’t go so well. I’m blessed to have cleaning ladies here every two weeks and they turn my house from chaos into calm in 2 to 3 hours. It’s a minor miracle and I love them. However, when they were cleaning my office yesterday they accidentally tweaked a chord and my screen died. It took me the rest of the day to figure out what had happened and by the time I did, it was time for bed! I’ll know for next time.

Anyway, I didn’t get around to writing a blog post and several other things. However, I did experiment with a new recipe which you’ll see at the bottom of this post and I think you’ll be glad that I cooked instead of typed!

Today we’re going to look into the last three detoxification pathways of the body – the white blood cells, the lymphatic system and the spleen.

The white blood cells
White blood cells, or leukocytes, are cells of the immune system involved in defending the body against both infectious disease and foreign materials. Five different and diverse types of leukocytes exist, but they are all produced and derived from a stem cell in the bone marrow.

The function of white blood cells is to digest and break down all foreign elements including toxins, dead cells, cellular wastes, bacteria and impurities in the blood. In order to fulfill this role, they congregate in the lymphatic tissues (the lymph nodes, spleen, thymus gland) and in special clean-up sites in the liver and small intestine.

The number of WBCs in the blood is often an indicator of disease. There are normally between 4×10⁹ and 1.1×10¹⁰ white blood cells in a litre of blood, making up approximately 1% of blood in a healthy adult. An increase in the number of leukocytes over the upper limits is called leukocytosis, and a decrease below the lower limit is called leukopenia. (Source: http://en.wikipedia.org/wiki/White_blood_cell)

Many vitamins, minerals and herbs can activate these white blood cells to serve us better:

  • Vitamin C helps your body create white blood cells. Consume 250 mg  daily from citrus, strawberries, melon, tomatoes, green leafy vegetables, papaya, mangoes, broccoli, potatoes, cabbage, green and red peppers, rose hips and the herb amla.
  • Zinc contributes to the formation of white blood cells and is part of the enzymes that repair your skin and allow your wounds to heal. Consume 20 mg of zinc daily from pumpkin seeds, sunflower seeds, almonds, walnuts, garlic, turnip, split peas, potatoes, lima beans, seafood, mushrooms, eggs, wheat germ.
  • Vitamin A aids in the synthesis of a specific white blood cell called a lymphocyte. Lymphocytes directly attack foreign invaders and help your immune system produce antibodies, which attack potentially harmful substances and protect your body from infection. Adults should consume 5000 IU daily. The best sources of vitamin A include butter, cream, egg yolks, fish liver oil from cod, salmon, halibut.
  • Vitamin D decreases the rate at which white blood cells are destroyed and removed from your body. This decreased rate of destruction does not affect the rate at which white blood cells are created, however. Instead, the decreased destruction rate allows your body to increase its white blood cell count, increasing your immune system’s ability to fight off infections. Adults require 800 IU of dietary vitamin D every day, depending on their age and sunlight exposure. Dietary sources of vitamin D include fortified milks (dairy, soy, rice, almond) and fish oils. (Source: http://www.lef.org/)
The lymphatic system
The lymphatic system is the part of the immune system comprising a network of conduits called lymphatic vessels that carry a clear fluid called lymph unidirectionally toward the heart.
This is the body’s sewage system, draining toxins from every corner of the body and because of its physical proximity to many tissues of the body, it is the system responsible for carrying cancerous cells between the various parts of the body. The intervening lymph nodes (full of filters and lymphocytes) can trap the cancer cells. If they are not successful in destroying the cancer cells the nodes can become inflamed and may become sites of secondary tumors.
A healthy immune system requires that the lymphatic system is draining freely and not overloaded with toxins. The vitamins and minerals outlined above to support the leukocytes are critical for the immune system. Other techniques that assist lymphatic circulation include:
  • lymphatic drainage massage techniques can be practiced (there are specially trained RMT in your area),
  • exercise is critical because it keeps all of the bodily fluids circulating optimally – rebounding on a small trampoline is especially beneficial – focus on movement of the arms, armpits and chest
  • dry brush massage (using a long-handled, natural bristle brush, brush in a circular motion towards your heart over every part of your body starting with the soles of your feet) in the morning when you arise,
  • alternating hot and cold showers,
  • going braless (see blog post on my experiment).

The spleen
Located behind and slightly below the stomach, the spleen is a fist-sized organ filled with macrophages which are white blood cells whose function is to digest bacteria, foreign particles and old red blood cells.

The spleen is a powerful filter of blood poisons (it is the largest mass of lymphatic tissue in the body) and can store blood for us to be released as we need it. Blood purifying herbs activate the macrophages and help them to do their job of devouring toxins. These include burdock root, goldenseal and echinacea.

The white blood cells in the spleen can be compromised by stress and periods of relaxation are essential. Sugar and excessive sweets are recognized as harming the spleen. Limit the use of ALL sugars.

I hope that you have found the information this week on the detoxification pathways to be very interesting and helpful in your understanding of the healing powers within our bodies. Now on to the delicious part of the blog – supper!

Pumpkin Gnocchi (from Canadian Living, Comfort Foods 2011)

This takes 1/2 an hour to prepare, so Saturday is the perfect day to prepare this dish that everyone can help with.

2 cups roasted pumpkin puree (I used a can of pumpkin puree this time – but have made using a roasted butternut squash)
1/2 cup finely grated Parmesan cheese
1 egg
1 tsp salt
1/4 tsp ground nutmeg
3 cups spelt flour (next time I’ll try making this gluten-free with some chick pea flour)

In a large bowl, stir together pumpkin, cheese, egg, salt and nutmeg. Using wooden spoon, stir in 2 cups of flour, Stir in enough of the remaining flour, 1/4 cup at a time, to make soft, sticky dough that pulls away from bowl but still sticks to spoon and fingers.

On well-floured surface and with floured hands, roll dough into a log – divide into quarters. Gently roll and shape each quarter into 3/4 inch diameter rope. With sharp, floured knife, cut each rope diagonally into 3/4 inch pieces.

In large pot of boiling, salted water, cook gnocchi in 2 batches. Stir gently until they start to float (they literally pop up to the surface) – takes about 3 minutes. Using slotted spoon, scoop onto large serving platter.

Meanwhile, make the spinach basil pesto – this is a standard in my house. I make up a big batch and freeze it in ice-cube trays. Then its an easy pasta topping after school or on the run.

Spinach Basil Pesto (Refresh, p. 105)

2 cloves garlic, minced
1 tsp salt
1/4 cup sunflower seeds
1/3 cup pine nuts
3 Tbsp olive oil
1 bunch fresh basil, stems removed
2 cups chopped baby spinach

Blend the garlic, salt, pine nuts, sunflower seeds and olive oil in a blender until smooth. Mix in the fresh basil and spinach and pulse until smooth.
To serve, you can either put a dollop on top of the gnocchi – but it’s room temperature, so I usually toss the gnocchi in the pesto sauce and serve with a sprig of basil on top and some grated Parmesan cheese and pepper.


Day 16 – Three more Detox Pathways

Posted April 14th, 2011 in Detoxification, Meatless, Recipes by Rebecca Lane

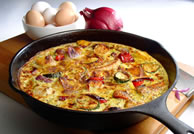
Eggs for dinner

Are you starting to see how our bodies naturally have a variety of ways to clear and cleanse themselves? Unfortunately, with all of the toxins we keep feeding ourselves, and those proliferating in our environment, its hard for the body to keep up. Even 20 years ago, there wasn’t the toxic load on the earth that there is today. Manufacturers continue creating foods that just do not serve our body’s health. And we keep buying them – blissfully unaware of the damage they create.

The intestines
After leaving the stomach where food mixes with stomach acid and enzymes, the acid is neutralized and more enzymes and bile are added into the mix. In the small intestine valuable nutrients are removed from the food and what cannot be used to feed the body is driven through into the large intestine with its muscular movements.

In the large intestine, water and remaining minerals are removed from the food and the rest is eliminated through bowel movements. One bowel movement for each meal consumed is the ideal for keeping the large intestine moving without backed up waste.

Unfortunately, it is rare for us to have the ideal in terms of bowel movements. The combined effects of stress, low fibre diet, insufficient hydration and lack of exercise can cause waste to build up on the large intestine’s walls, forming crusts and pockets where bacteria, yeast and other microorganisms proliferate and infection can follow.

We can support the elimination process through the intestines by consuming a diet high in fibre (about 30 grams of fibre per day is a good starting point), 1.5 to 2 litres of water per day, add probiotics to keep our gut ecology (or the “good bacteria”) healthy, regular exercise to stimulate the movement of muscles and avoid antibiotics which disrupt the balance of our body.

The kidneys
The kidneys take care of the elimination of water-soluble toxins and excess minerals. They are filled with about one million tiny filtration units called nephrons, which collectively cleanse 180 litres of blood each day.

Water, and lots of it, is the best way to support our kidneys in their elimination role. Drink water (1 ½ to 2 litres) free of chemicals and pesticides. There are many water purification systems available to fit any budget. My family uses a counter-top Santevia filtration system that was in the $160 range and we change the filters per the instructions – which cost about the start-up price annually.

Another way to support the kidneys is to maintain a low sodium/high potassium diet to increase the efficiency of cellular detoxification and elimination via the kidneys. Sodium is present in the fluid outside each cell, potassium inside each cell. When one is low, the other will be high. If sodium levels are high, the body’s cells may swell and trap toxins inside. Restricting sodium consumption allows less fluid retention. Potassium preserves alkalinity of the body fluids and encourages the kidneys to eliminate toxic waste products.

Foods with the best low sodium/high potassium ratios are navy beans, caraway seeds (also good for increasing Phase 1 liver detox), dark cherries, dried apricots, lentils, walnuts, oranges, almonds, apples, avocado, peaches, banana, grapefruit, pineapple, squash, sage, mint and apple cider vinegar.

The thymus gland
The thymus gland, which lies just beneath the breast bone, is the main immune organ of the body. It is large in infants, and shrinks as we age. Its function is to program white blood cells, the body’s immune army, in their various tasks and then sends them into the blood to recognize and destroy pathogens.

The thymus develops our resistance to bacteria, cancer, viruses, toxins and allergens and stimulates the production of white blood cells in the bone marrow. It controls the lymphatic system of glands and ducts by turning up the volume on the elimination of wastes.

This gland is highly responsive to our emotions and shuts down when we are feeling stressed, unfulfilled, and without purpose. As a result, the white blood cells become fewer in number and less aggressive.

Support for the thymus gland can be achieved through a healthy diet, healthy sleep patterns so that the body produces melatonin and receives adequate rest, water and exercise, and responds best to our learning to manage stress effectively.

Antioxidants like vitamins C and E, beta carotene and selenium are critical to protect the thymus from free radical damage. Other nutrients such as zinc and vitamin B6 are important because they are required for the production of thymic hormones.

Eggs can be eaten during a detoxification program because the protein is more easily absorbed than any other protein, except for whey. To enrich more anti-oxidant power, add fresh herbs from your garden, such as basil or parsley.

Zucchini, Pepper and Goat Cheese Frittata

 2 tsp.  olive oil
2 cups mixed diced vegetables (choose from zucchini, asparagus, spinach, broccoli, and/or onions
1/2  red pepper, diced
1/2 tsp. salt with trace minerals
1/2 tsp cayenne pepper
8  large eggs
6 green onions, chopped
½ cup  minced parsley or mixture of fresh green herbs
2  garlic cloves, minced
1 cup crumbled goat cheese
Dulse to sprinkle on the top

Preheat the oven to 350 F. Chop the green vegetables, onions, and red pepper and green onions. Heat a cast iron skillet over medium heat. Heat olive oil and sauté vegetables, stirring occasionally for five minutes.

In a large bowl, whisk the eggs, cayenne pepper and salt and pour over the vegetables. Add green onions, herbs, and basil. Crumble the goat cheese on top.

Let it cook undisturbed over moderate heat for three to four minutes, until eggs are set on the bottom and edges. Transfer to the oven and cook for 15 to 20 minutes until eggs are cooked in the centre and the goat cheese is slightly brown.

Serve it in the hot skillet, or later at room temperature. Cut into wedges. Sprinkle with dulse. Serve with a spinach salad.