Quinoa, Roasted Beet and Walnut Salad

Posted October 30th, 2011 in Grains, Recipes by Rebecca Lane

Quinoa, Roasted Beet and Walnut Salad - spring version!

This is my favourite salad – originally from Ricki’s Kitchen (http://www.dietdessertndogs.com/)- but I’ve made it so many times now that it has evolved (or devolved as the case may be). Anyway I found out that it wasn’t available on my site when I tried to find it for @SandiKrakowski a twitter friend. Imagine my embarrassment!

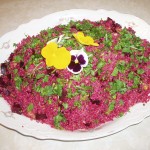
Quinoa, Roasted Beet and Walnut Salad

 The brilliant crimson of roasted beets lends a gorgeous hue to this mineral- and protein-rich salad. Roasting the beets brings out their true sweetness and tender texture in contrast to the chewy quinoa and crunchy walnuts.

3-4 medium beets, washed and trimmed (do not peel)
1 cup dry quinoa
2 cups water
½ cup walnuts, lightly roasted and cooled (or you can use the spicy pecan recipe here)
2-3 cloves garlic, minced or grated
Grated rind of one lemon
Juice of one lemon (about ¼ cup)
2 Tbsp balsamic vinegar
¼ cup extra-virgin olive oil
2 tsp Dijon mustard
1 tsp. Maple syrup
1/3 cup fresh cilantro, chopped
Pepper to taste

  1. Preheat oven to 425F. Wrap beets in foil and bake until extremely tender, about 45 minutes to 1 hour. Let cool, then slip off the skins and dice into 2 cm cubes. Set aside.
  2. Bring water to boil in a small heavy saucepan. Rinse quinoa well and add to water. Return to boil, then reduce heat to low and cover. Allow to simmer, untouched, for 25 minutes, then check to see if water has been absorbed. If not, continue simmering until all water is absorbed, then uncover and allow to cool. (If you are in a hurry, you can turn the hot quinoa into a glass bowl at this point and place it in the fridge for about 30 minutes).
  3. In a nonstick frypan, heat oil and add garlic and lemon rind. Cook and stir for 2 minutes, then add balsamic vinegar, lemon juice and maple syrup. Remove from heat.
  4. Add beets to cooled quinoa. Break walnuts into pieces and add to the bowl. Pour dressing over and toss well until quinoa becomes pink. Add cilantro and combine well. Season to taste with pepper. This salad is even better the second day, after flavours meld.

Serves 4

NYC and the Natural Gourmet Institute

Posted May 23rd, 2011 in Cooking classes, Grains, Meatless, Recipes, Restaurant review by Rebecca Lane

We had a wonderful, whirlwind tour of NYC this weekend that included a Pasta cooking class at Natural Gourmet Institute and a walking (and eating) tour of Chinatown. I’ve got lots of photos and a recipe to follow – but first the details!

Sherri & Pina at Xai Xai, a South African Restaurant

Before we begin, I want to apologize for the fact that there are no photos of me. It seems that if you remember to bring a camera, then you become the biographer rather than the subject of the biography! Anyway, there are very few photos of me because I often remember my camera! Enough said.

We arrived in NYC on Thursday afternoon and spent the afternoon walking toward the Theatre District and visited Times Square (this was quite a hike from our hotel at W 29th and 7th Avenue – the Holiday Inn Express). About 5 o’clock in the afternoon we walked by the sign for Wicked and decided that we would try and get cancelled tickets. We quickly managed to get 2 tickets but were waiting on a 3rd when something wonderful happened. There was a lottery called for 13 spots in the front row! Who knew? So Sherri and I left Pina in the line-up and put our names in the lottery along with 100s of other people. There were a lot of people trying to get these tickets! Anyway, I won a ticket and for $26.25 I was able to watch ‘Wicked’ from the front row.

To celebrate, we walked down to Xia Xia, a South African restaurant for a Margaritta (I know, you don’t usually associate the two – but they were on sale for $4 there and we couldn’t resist). Along with the delicious margarittas, we tried Goat Cheese Stuffed Pepperdaw Peppers which are delicious mildly spicy peppers from South Africa. Got to try and find them here – does anyone know where I might find them in Toronto?

With the pepperdaws, we had Oven-roasted Asparagus with Melted Brie in an Orange Honey sauce. I’m thinking that the name should say it all.  It was fabulous. Melted brie topped with asparagus tips served with an orange-honey sauce that would have been even better if the orange was a stronger flavour. When I try it at home, I think that I’ll try zesting some of the rind to punch up the flavour.

The next day was Friday, and we spent the day shopping. It rained all day so we literally ducked from one store into the next. But a few shoes managed to find their way into my suitcase as well as a raincoat and matching scarf. Our destination for lunch was Angelica’s Kitchen on E 12th street. I can’t remember what we ate exactly as I didn’t take notes nor did I take photos (hey, it was raining, we walked many, many miles and my feet were wet and blistered – I was not in my happy place!). We started with the soup of the day which was potato and leek with an arugula sauce on the top. It was a beautiful white soup with a swirl of green on the top. After that, we asked the waiter for help (I think we were all in the same ‘gloomy cloud’ place and so hungry and thirsty we couldn’t really make decisions) and he suggested that we try the Pantry Plate with hummus, a simple salad, and garlic lemon marinated kale. It was tasty – to finish off the hummus we tried some of their Sourdough bread which was a good idea as we didn’t want to waste any!

By this time we needed to head back to the hotel and dry off before our Pasta class. I have to admit that I was feeling so exhausted that the idea of standing for the next 4 hours filled me with dread. Yeah – I had come all of this way for this one class and I just wanted to go to bed with my feet suspended high above me. And I thought those boots were made for walking!

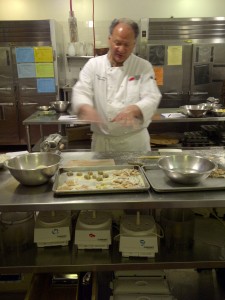
Chef Richard LaMarita demonstrating how to make pasta

Despite my trepidations and my aching feet, off we marched to the Natural Gourmet Institute to learn how to make pasta. And let me tell you that I’m really glad that I did. We had a blast! Chef Richard LaMarita was so knowledgeable, not just about the food but he had learned how to make it by traveling around the area and learned from the locals. Can you imagine? I would so love to do that! Look out world, I’m going to join the ranks of traveling food writers! I just want to eat everywhere really.

Here’s a shot of Richard showing how to make the pasta and get it ready for cooking. Note how his hands are blurred? That’s because he talks with his hands too!

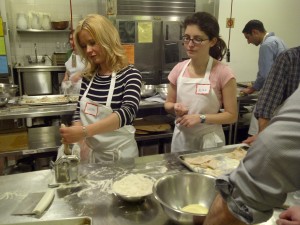
Sherri rolling out the dough for Pappardelle pasta

We made delicious sauces too, then came the exciting phase – rolling out the pasta dough! Here’s Sherri showing you excellent technique! That’s Aliza helping out because Sous-chef Rebecca chose this moment to take some photos. She and Daniel worked on the same recipes as we did – so we were a little competitive. Thanks for the ribbing you two!

Enough writing for today. All these food ideas has made me hungry so I need to go and think about what’s for supper. I’ll tell you all about Chinatown and Blossom tomorrow. This way you’ll get two recipes instead of just one!

This was our favourite recipe – Rye Gnocchi with Sage Butter with grateful thanks for sharing it with us to Natural Gourmet Institute and Chef Richard.

Rye Gnocchi with Sage Butter

Gnocchi

2 lbs baking potatoes (about 4), washed
kosher salt to sprinkle on baking sheet
2 egg yolks, beaten
1 tsp salt
1/4 tsp black pepper
1 tsp ground caraway seed
1/2 to 1 cup rye flour (+ 2 Tbsp for dusting baking sheet)

Sauce

6 Tbsp unsalted butter
1/4 cup fresh sage leaves, chiffonade (plus 6 whole for garnish)
salt and black pepper to taste
1/4 cup parmesan cheese

  1. Preheat oven to 400°F. Pierce the potatoes all over with a fork and place on a baking sheet covered with kosher salt (you want the potatoes to dry out, so cover the pan well to absorb all of the moisture). Bake potatoes for 1 hour, or until for tender. Set aside to cool until warm, not hot.
  2. While the potatoes are still warm, scoop out flesh from the skin. Pass them through a ricer and place in a bowl. Be sure to keep the potatoes as light and fluffy as possible, ensuring a light gnocchi.
  3. Add the egg yolks, salt, pepper, ground caraway seed and just enough flour to create the dough. Do not overwork it, add just enough flour to make it come together. Do not knead. Cut the dough in half and roll into cords about 1.5″ thick. Cut off pieces about 3/4″ long with a pastry knife. Set aside on a baking sheet sprinkled with rye flour. Gnocchi can be frozen at this point.
  4. Place the gnocchi into boiling, salted water. Cook until they float and start to swell slightly (about 1 minute after they float to the surface). Undercooking the gnocchi will make them heavy. Overcooking them will make them tough.
  5. While gnocchi are cooking, melt the butter in a pan just until it begins to brown. Quickly take the pan off the heat and toss in the sage leaves. Season with salt and pepper. Take gnocchi out of the water (we used a large spider scieve) and place right into sauce in pan. Toss to fully coat. Serve sprinkled with parmesan cheese and garnished with sage leaves.

Day 28 – Election Day & Granola

Posted May 2nd, 2011 in Grains, Recipes by Rebecca Lane

What a wonderful weekend! Saturday was a beautiful gift and I spent it outside the whole day – I even have the pink shoulders to prove it. Then rain on Sunday meant that I could have a snoozy day – catching up on rest and reading under a blanket. And since I don’t do any cooking on Sunday, I really did it for the whole day.

Today, I had an appointment downtown Toronto which I’ve just returned from to find a comment requesting my recipe for granola. So I’m going to give you my granola recipe, then I’m heading off to the poles to vote. Afterward I plan on making a beet and carrot salad, and a pasta and asparagus and feta cheese salad I think – maybe with some little appetizer-sized falafal to round it out for dinner.

Here’s the recipe for Crunchy Granola – adapted from Eva Cabaca’s Holistic Food Preparation course notes. She has a new cookbook available from her site: http://www.livenutritionschool.com

Crunchy Granola

3 cups oat flakes (or sprouted buckwheat)
1 cup almonds, coarsely chopped (or any nuts that you choose)
1 cup dry coconut flakes (or a combination of coconut and seeds)
1/2 cup currants (or cranberries, or dried blueberries)
1/2 cup water
1/3 cup rice syrup
2 Tbsp coconut oil
2 Tbsp olive oil
pinch salt
spice as desired (ginger and cinnamon are my first choices)

Mix the oat flakes, nuts, coconut, currants and spices together in a large bowl. Bring water to boil in a small saucepan, remove from heat and add the rice syrup, coconut oil, olive oil and salt. Dissolve.

Stir the wet ingredients into the dry and mix well. Clumps will form.

Place the contents onto a cookie sheet or large baking pan and dry at 150°F for 4 hours until crispy. Do not mix during drying.

When finished, cool, and store in an air-tight container.

I have this every morning covered with my kefir, some sliced fresh fruit and then a spoonful of ground flax seed on top. Delicious.

Day 27 – The Joy of Vegetables Part 2

Posted April 28th, 2011 in Fish, Grains, Recipes, Salads by Rebecca Lane

I’m not hearing any buses yet, so I’m going to keep on writing!

Lately, Sherri and I have been working away at creating delicious Gluten-Free baked goods recipes (crackers, muffins, cookies, cakes, buns, breads) for our teaching kitchen and I realized this morning that this is a problem. These baked goods are for ‘occasional’ meals only. As a society we have relied heavily on them as the backbone and focus of our meals and snacks – to the detriment of our health. Instead of looking at ways of making gluten-free, sugar-free, dairy-free baked goods, let’s concentrate on foods that are really going to heal and nourish our bodies.

Turn the page to VEGETABLES!

We can make a healthy choice to focus instead on finding delicious ways to fill at least half of every plate we eat with vegetables. This is the foundation. There are endless combinations and permutations we can combine to make delicious smoothies, spreads (for cucumbers, celery, slices of raw turnip, sweet potatoes, celery root), salads, stir fry’s or roasted vegetables. And when we add fruit to the mix, the sky’s the limit!

My favourite guide is George Mateljan’s book (and website) The World’s Healthiest Foods. The world’s most nutrient-dense foods do not lie in the animal protein list – but fall instead in the Vegetables list! Surprised? Topping the list – spinach, swiss chard, crimini mushrooms and asparagus. Of a three column list, two of the columns include vegetables, fruit, beans and legumes, herbs and spices and nuts and seeds. Grains are near the bottom with dairy and eggs and poultry and lean meats. Fish and shellfish lie between the two groups.

So, for the next week, I’m going to change my focus and start learning about the wonderful tastes and vitality of healthy, nutrient-rich vegetables. In the morning, I enjoy whole grain granola (and I’ll give you the recipe in case you would like to try it) with home-made kefir topped with fresh fruit. I’m trying to get the kids to have a smoothie to take with them to school for breakfast, but am still perfecting that option. For lunch, I usually have a salad with the leftovers from dinner before, or in the winter a salad with some soup. But I’m going to experiment more with combining beans and vegetables probably with some grains like quinoa and buckwheat. As for dinner, vegetables steamed, stir-fried, roasted and drizzled with a little olive oil or flax oil and seasoned with herbs, along with some lean meat or fish seasoned with fresh herbs. If I need a sweet later on, I’ll have some fresh fruit with a little more granola or sprinkled with flax seeds.

I’ll be honest, usually about 9:30 we have a “cup of tea” as a family which usually includes a cookie. Maybe this is the ‘occasion’. How many cookies or baked goods per week is the “right” amount? From my years of yo-yo dieting and bulimia, the one thing that I do KNOW is that once I put restrictions on the food that I am allowed to eat, I crave that restricted food. So I cannot answer that question. I think that the answer is different for each of us. But I do think – and will research this over the coming weeks – that if I fill my body with healthy, nutritious vegetables and fruits, I may not want a cookie or sweet at night.

I’ll be fully nourished.

Interesting thought!

Sautéed Asparagus

1 lb of asparagus, bottom twiggy section snapped off and the rest cut into 2 inch sections
3 Tbsp of vegetable broth

Heat the broth in a skillet over medium heat. Once it starts to steam, add the asparagus. Cover and cook for 5 minutes. Transfer to a bowl and toss with the Dressing for the buckwheat below.

Pan-Fried Perch

1 lb of fresh perch
2 Tbsp olive oil
2 Tbsp vegetable broth
2 cloves garlic, minced

Heat the broth and olive oil under medium heat, add the minced garlic and sauté for 2 minutes. Add the perch skin side down and cover. Fry for 3 – 5 minutes until the meat looks white and flakey. Remove from heat and serve.

Buckwheat Salad with Chick Peas, Cucumber, Tomatoes and Fresh Parsley

1 cup buckwheat (I used Kasha or toasted buckwheat)
2 cups water
1/2 tsp sea salt

½ can chick peas, drained and rinsed
½ English cucumber, small cubes
½ red onion, halved and thinly sliced
handful small grape tomatoes, halved
handful chopped fresh parsley

Dressing (make up and save as an easy salad dressing)
1/2 cup extra virgin olive oil
1/3 cup fresh lemon juice
zest of lemon
4 cloves garlic
Sea salt and pepper to taste

Cook the buckwheat – put first three ingredients together in pot and cover. Bring to a boil for a minute, then turn down to low and simmer for 10 – 12 minutes. Buckwheat is fully cooked when it is dry and fluffy. Do not stir the buckwheat while it is cooking.

Press garlic and let sit for 5 minutes (allows the health-promoting nutrient allicin to form). Whisk together with olive oil, lemon juice, garlic, salt and pepper.

Toss the buckwheat with the vegetables and chopped parsley and dress to taste. Serve on a bed of lettuce or spinach.

I’m going to add a photograph once I’ve got it all put together. New experience!

Day 27 – The Joy of Vegetables

Posted April 28th, 2011 in Gluten-Free Flours, Grains by Rebecca Lane

I have a theory, and I may be thrown under a moving bus for this, so hang on. As a society, we focus too much on eating grains. At Nature’s Emporium we have constant requests for how to heal stomach problems – like colitis, Crohn’s, Celiac disease, IBS – as well as inflammatory diseases – like arthritis, asthma, cancer. Everybody wants to know about Gluten-Free Diets.

 Here’s my theory: the solution is not to find out about which grains are Gluten-Free, but to change the focus from a grain-centered diet, to a vegetable and fruit-centered diet. Yes, we do need the complex carbohydrates that grains offer our diet. As a result, learning about which grains are gluten-free is important, and I’ll list them below for you in a minute. But when we start telling ourselves and the people around us that we are “on a Gluten-Free Diet” we’re out of focus!

From my quick research online, and my own knowledge and experience, there are 9 gluten-free grains:

  • Rice – white, wild or brown (white rice has been milled – that is the husk, bran and germ have been removed. Since these are where most of the nutrients in a grain are found, white rice has little nutritional value. There’s lots more information about rice on the Lundberg  site, as well as the Livestrong  site.)
  • Millet
  • Quinoa – white and brown (or red)
  • Corn (though it’s really a vegetable)
  • Teff
  • Amaranth
  • Buckwheat – includes Kasha which is roasted Buckwheat
  • Montina – otherwise known as Indian rice grass
  • Sorghum


Day 25 – Crackers and bean spread, fast and delicious

Posted April 26th, 2011 in Gluten-Free Flours, Grains, Meatless, Recipes by Rebecca Lane

You can make a delicious bean spread from any beans you have available. And they only take a few minutes to put together. If you use canned beans, choose unsalted, organic brands like Eden Organic.

The main components of a bean spread are:

  • beans – what you have cooked, or in your pantry
  • nut butter – tahini, almond nut butter
  • olive oil
  • garlic – my personal opinion is that you can never have too much garlic as long as your partner has some too!
  • seasoning – herbs and spices that compliment the beans you have on hand and the vegetables you choose to add – this is where you need to know what tastes good with what, or you can go online and research what combinations have already been tried
  • salt
  • lemon juice
  • vegetables – this is where I use up leftovers, especially slow roasted sweet potatoes, squash, red peppers or eggplant

Great Northern Bean & Roasted Sweet Potato Spread

Yes, that’s what we had in the fridge and pantry to go with the Arrowroot crackers we were experimenting with. Oh, that’s how this all started. Sherri and I were starting to go through the recipes we’re compiling for the Holistic Cooking Academy (moving in upstairs at Nature’s Emporium soon) and we found the recipe for Arrowroot Crackers that follows. Since you HAVE to have a delicious spread to cover such wonder, we whipped this up for you.

1 can                            Great Northern Bean (Eden brand)
2 Tbsp                          tahini
2 Tbsp                          olive oil
2 Tbsp                          water
1 clove                         garlic

½ cup                           roasted sweet potatoes (skins removed)
1 tsp                             curry powder
½ tsp                            kelp salt
½ tsp                            paprika
½ tsp                            cumin 

  1. In a food processor, combine the first 5 ingredients until they reach the desired consistency of a bean spread (thick – but not too thick because it will break your crackers!).
  2. Add second group of 6 ingredients and process until smooth.
  3. Enjoy with some delicious crackers – like the Arrowroot crackers.

Sherri Doak and I will be teaching how to make the following Gluten-Free Arrowroot crackers in the Gluten-Free Baking class in September at Nature’s Emporium.  But until then, you can try them out yourself. Here’s the recipe.

Arrowroot Crackers

1 tbsp ghee or clarified butter
1/2 cup light bean flour (like chick pea)
1½ cups arrowroot flour
1 cup  almond meal
2 tsp baking powder
1 tsp  salt with trace minerals
¾ cup purified water – warm
1 tbsp. honey
1 tsp  thyme
½ tsp  basil

Parchment paper
1 egg
1 tsp toasted sesame seeds or black onion seed
½ tsp dulse

 1.  Prepare the batter. Melt butter in a small dish in a low oven. In a medium-sized mixing bowl, mix flours, almond meal, baking powder, thyme, basil and salt. Mix warm water and honey and add to dry ingredients. Add melted butter, and stir, and then mix gently to form moist dough. Turn on oven to 300° F.
2.  Create the cracker. Place parchment paper onto a large bar pan. Press and stretch dough with your fingers into the pan, until dough is very thin – about 1/16th-of-an-inch. Roll with a small roller to help make it smooth. Glaze with a beaten egg, and evenly sprinkle on seeds and dulse. Cut five rows down and eight rows across to make 40 squares. Prick with fork to prevent bubbling.
3.  Bake 30 minutes or until crackers are crisp. Cool on a rack, and then lift parchment paper to slide crackers to a serving dish. Serve with your favorite  bean spread.
4.  Store in an airtight container, or in a tin with waxed paper, and refrigerate.

Hope you enjoy whipping up your own bean spreads with what you have in the pantry and frig!

Incoming search terms:

  • arrowroot crackers

Day 24 – Cooking with my Daughter

Posted April 25th, 2011 in Grains, Meatless, Recipes by Rebecca Lane

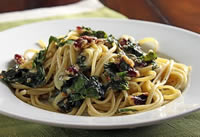
Walnuts, Swiss Chard & Port-Salute cheese with Noodles

Today is a very special day. For the first time in recent memory (we used to bake together often when she was younger), my teenager suggested that she make supper tonight. Who ever heard of such a thing?

And to make it even more exciting, she went exploring online and came up with a recipe that we made. Now, I’m going to come up with some suggestions to make it even better.

The original recipe came from Saveur but we’re adapting it.

Walnuts, Red Swiss Chard and Port-Salute Cheese on Soba Noodles
Serves 4

1 cup shelledwalnut pieces – with spices and maple syrup

  • 1/4 cup chili powder
    2 Tbsp sea salt
    1 Tbsp ground cumin
    1 Tbsp paprika
    1 Tbsp coriander
    1 Tbsp pepper
    1 tsp cinnamon
  • Mix the spices together and keep – makes enough for 5 batches of the roasted nuts
  • 2 Tbsp maple syrup
  • Roast walnuts in a single layer (on parchment paper) on a cookie sheet at 300°F for 20 minutes. Remove from oven and sprinkle with spice mixture and maple syrup. Stir thoroughly. Return to hot oven and let absorb liquid and dry the nuts – another 10 minutes.

1 bunch red swiss chard
2 Tbsp walnut oil
2 shallots, peeled and minced
3 large cloves garlic, peeled and minced
Zest of one lemon (save a little for garnish)
1/4 cup vegetable stock
Dulse and Freshly ground black pepper
8 oz Soba Noodles
4 oz Port-Salute cheese or other semi-soft cheese cut up into bits (you will need to refrigerate it in order to cut it up)

Trim swiss chard leaves, discarding tough stems. Chop coarsley and set aside.

Heat walnut oil in a medium skillet over medium-low heat. Add shallots and garlic and cook until shallots are soft, stirring occasionally – about 7 minutes. Add the vegetable stock, lemon zest and swiss chard, season with dulse and pepper – cover and allow to wilt – about 5 minutes.

At the same time, cook the soba noodles in a large pot of boiling salted water for 8 minutes. Drain and return to pot. Stir in cheese and walnuts.

To serve, put pasta on a platter with the swiss chard, garlic and shallots on top. Garnish with a few of the toasted, spiced walnuts on top along with  lemon zest.

The Port-Salute cheese is very creamy and quiet. You could use any other semisoft cheese that you have on hand – one with more flavour might be nice to compliment the bitterness of the swiss chard.


I use the nut spice for walnuts and more often pecans. I keep the spiced nuts for a week in a mason jar – they don’t seem to last longer than that as they can be added to spice up a salad, a noodle bowl, pad thai – you name it, they make it taste better. At Christmas, you can even make up jars as presents for your friends.