Day 27 – The Joy of Vegetables Part 2

Posted April 28th, 2011 in Fish, Grains, Recipes, Salads by Rebecca Lane

I’m not hearing any buses yet, so I’m going to keep on writing!

Lately, Sherri and I have been working away at creating delicious Gluten-Free baked goods recipes (crackers, muffins, cookies, cakes, buns, breads) for our teaching kitchen and I realized this morning that this is a problem. These baked goods are for ‘occasional’ meals only. As a society we have relied heavily on them as the backbone and focus of our meals and snacks – to the detriment of our health. Instead of looking at ways of making gluten-free, sugar-free, dairy-free baked goods, let’s concentrate on foods that are really going to heal and nourish our bodies.

Turn the page to VEGETABLES!

We can make a healthy choice to focus instead on finding delicious ways to fill at least half of every plate we eat with vegetables. This is the foundation. There are endless combinations and permutations we can combine to make delicious smoothies, spreads (for cucumbers, celery, slices of raw turnip, sweet potatoes, celery root), salads, stir fry’s or roasted vegetables. And when we add fruit to the mix, the sky’s the limit!

My favourite guide is George Mateljan’s book (and website) The World’s Healthiest Foods. The world’s most nutrient-dense foods do not lie in the animal protein list – but fall instead in the Vegetables list! Surprised? Topping the list – spinach, swiss chard, crimini mushrooms and asparagus. Of a three column list, two of the columns include vegetables, fruit, beans and legumes, herbs and spices and nuts and seeds. Grains are near the bottom with dairy and eggs and poultry and lean meats. Fish and shellfish lie between the two groups.

So, for the next week, I’m going to change my focus and start learning about the wonderful tastes and vitality of healthy, nutrient-rich vegetables. In the morning, I enjoy whole grain granola (and I’ll give you the recipe in case you would like to try it) with home-made kefir topped with fresh fruit. I’m trying to get the kids to have a smoothie to take with them to school for breakfast, but am still perfecting that option. For lunch, I usually have a salad with the leftovers from dinner before, or in the winter a salad with some soup. But I’m going to experiment more with combining beans and vegetables probably with some grains like quinoa and buckwheat. As for dinner, vegetables steamed, stir-fried, roasted and drizzled with a little olive oil or flax oil and seasoned with herbs, along with some lean meat or fish seasoned with fresh herbs. If I need a sweet later on, I’ll have some fresh fruit with a little more granola or sprinkled with flax seeds.

I’ll be honest, usually about 9:30 we have a “cup of tea” as a family which usually includes a cookie. Maybe this is the ‘occasion’. How many cookies or baked goods per week is the “right” amount? From my years of yo-yo dieting and bulimia, the one thing that I do KNOW is that once I put restrictions on the food that I am allowed to eat, I crave that restricted food. So I cannot answer that question. I think that the answer is different for each of us. But I do think – and will research this over the coming weeks – that if I fill my body with healthy, nutritious vegetables and fruits, I may not want a cookie or sweet at night.

I’ll be fully nourished.

Interesting thought!

Sautéed Asparagus

1 lb of asparagus, bottom twiggy section snapped off and the rest cut into 2 inch sections
3 Tbsp of vegetable broth

Heat the broth in a skillet over medium heat. Once it starts to steam, add the asparagus. Cover and cook for 5 minutes. Transfer to a bowl and toss with the Dressing for the buckwheat below.

Pan-Fried Perch

1 lb of fresh perch
2 Tbsp olive oil
2 Tbsp vegetable broth
2 cloves garlic, minced

Heat the broth and olive oil under medium heat, add the minced garlic and sauté for 2 minutes. Add the perch skin side down and cover. Fry for 3 – 5 minutes until the meat looks white and flakey. Remove from heat and serve.

Buckwheat Salad with Chick Peas, Cucumber, Tomatoes and Fresh Parsley

1 cup buckwheat (I used Kasha or toasted buckwheat)
2 cups water
1/2 tsp sea salt

½ can chick peas, drained and rinsed
½ English cucumber, small cubes
½ red onion, halved and thinly sliced
handful small grape tomatoes, halved
handful chopped fresh parsley

Dressing (make up and save as an easy salad dressing)
1/2 cup extra virgin olive oil
1/3 cup fresh lemon juice
zest of lemon
4 cloves garlic
Sea salt and pepper to taste

Cook the buckwheat – put first three ingredients together in pot and cover. Bring to a boil for a minute, then turn down to low and simmer for 10 – 12 minutes. Buckwheat is fully cooked when it is dry and fluffy. Do not stir the buckwheat while it is cooking.

Press garlic and let sit for 5 minutes (allows the health-promoting nutrient allicin to form). Whisk together with olive oil, lemon juice, garlic, salt and pepper.

Toss the buckwheat with the vegetables and chopped parsley and dress to taste. Serve on a bed of lettuce or spinach.

I’m going to add a photograph once I’ve got it all put together. New experience!

Day 27 – The Joy of Vegetables

Posted April 28th, 2011 in Gluten-Free Flours, Grains by Rebecca Lane

I have a theory, and I may be thrown under a moving bus for this, so hang on. As a society, we focus too much on eating grains. At Nature’s Emporium we have constant requests for how to heal stomach problems – like colitis, Crohn’s, Celiac disease, IBS – as well as inflammatory diseases – like arthritis, asthma, cancer. Everybody wants to know about Gluten-Free Diets.

 Here’s my theory: the solution is not to find out about which grains are Gluten-Free, but to change the focus from a grain-centered diet, to a vegetable and fruit-centered diet. Yes, we do need the complex carbohydrates that grains offer our diet. As a result, learning about which grains are gluten-free is important, and I’ll list them below for you in a minute. But when we start telling ourselves and the people around us that we are “on a Gluten-Free Diet” we’re out of focus!

From my quick research online, and my own knowledge and experience, there are 9 gluten-free grains:

  • Rice – white, wild or brown (white rice has been milled – that is the husk, bran and germ have been removed. Since these are where most of the nutrients in a grain are found, white rice has little nutritional value. There’s lots more information about rice on the Lundberg  site, as well as the Livestrong  site.)
  • Millet
  • Quinoa – white and brown (or red)
  • Corn (though it’s really a vegetable)
  • Teff
  • Amaranth
  • Buckwheat – includes Kasha which is roasted Buckwheat
  • Montina – otherwise known as Indian rice grass
  • Sorghum


Day 26 – Virtual cooking

Posted April 27th, 2011 in Fish, Recipes, Salads by Rebecca Lane

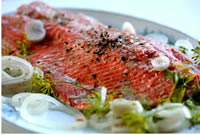
Poached Salmon with Dill

There’s nothing better than a good talk with good friends. It never fails to amaze me how we can not talk for ages, then one day we get together and the conversation flows like wine (btw – wine helps that conversation flow!). Tonight, I was enjoying a beautiful evening out on the back porch nursing a nice cold Tankhouse Ale and thinking about what I would make for dinner. I decided to call my wonderful girlfriend Sandee who lives far, far away in Burlington. I would have preferred to be sharing the beer with her in her backyard, walking through her garden saying “oh, look how that’s growing” etc. – but a telephone conversation was what we had – so we enjoyed it.

By the end, we were both talking about dinner and she told me what she made last night. Since it sounded too amazing for words, I’m sharing it with you tonight and we’re adding some poached salmon just to make it more delicious!

Greek Salad with Feta Cheese, Kalamata Olives and Dill

2 Tbsp fresh dill (if you aren’t a huge dill fan, you may want to use 1 Tbsp), minced
1/2 of an English Cucumber, cubed
2 large Ontario vine-ripened tomatoes, cubed
1 cup baby spinach
1 cup mixed greens
1/2 cup Kalamata olives
1 Tbsp dried oregano
1 cup feta cheese, cubed
1 small sweet Vidalia onion
Freshly ground black pepper

Dressing: 1 to 1 mixture of apple cider vinegar and olive oil (1/2 cup each)

Mix everything together and cover with 1/2 of dressing and let sit so that the olives and feta can absorb in the flavour.

Poached Salmon with Dill and Tzitziki Sauce

Meanwhile, preheat the oven to 350°F. Put one large salmon fillet (or you can do two depending on how many people you are serving) on a piece of tin foil large enough to fold into a packet around it. Pour about 1 Tbsp of olive oil on top, squirt the juice of 1/2 lemon, add a couple of slices of the sweet onions and sprinkle with fresh dill. Close up the packet and place in the oven on a baking sheet. Cook for 15 to 20 minutes depending on thickness of fillet.

To serve, put the Greek Salad on half of the plate, then place the fillet on the other half with a dollop of tzitziki sauce on the top. I didn’t make the sauce, I picked up a container of Liberte brand. But the next time I make this, I’m going to the Danforth ahead of time!

Day 25 – Crackers and bean spread, fast and delicious

Posted April 26th, 2011 in Gluten-Free Flours, Grains, Meatless, Recipes by Rebecca Lane

You can make a delicious bean spread from any beans you have available. And they only take a few minutes to put together. If you use canned beans, choose unsalted, organic brands like Eden Organic.

The main components of a bean spread are:

  • beans – what you have cooked, or in your pantry
  • nut butter – tahini, almond nut butter
  • olive oil
  • garlic – my personal opinion is that you can never have too much garlic as long as your partner has some too!
  • seasoning – herbs and spices that compliment the beans you have on hand and the vegetables you choose to add – this is where you need to know what tastes good with what, or you can go online and research what combinations have already been tried
  • salt
  • lemon juice
  • vegetables – this is where I use up leftovers, especially slow roasted sweet potatoes, squash, red peppers or eggplant

Great Northern Bean & Roasted Sweet Potato Spread

Yes, that’s what we had in the fridge and pantry to go with the Arrowroot crackers we were experimenting with. Oh, that’s how this all started. Sherri and I were starting to go through the recipes we’re compiling for the Holistic Cooking Academy (moving in upstairs at Nature’s Emporium soon) and we found the recipe for Arrowroot Crackers that follows. Since you HAVE to have a delicious spread to cover such wonder, we whipped this up for you.

1 can                            Great Northern Bean (Eden brand)
2 Tbsp                          tahini
2 Tbsp                          olive oil
2 Tbsp                          water
1 clove                         garlic

½ cup                           roasted sweet potatoes (skins removed)
1 tsp                             curry powder
½ tsp                            kelp salt
½ tsp                            paprika
½ tsp                            cumin 

  1. In a food processor, combine the first 5 ingredients until they reach the desired consistency of a bean spread (thick – but not too thick because it will break your crackers!).
  2. Add second group of 6 ingredients and process until smooth.
  3. Enjoy with some delicious crackers – like the Arrowroot crackers.

Sherri Doak and I will be teaching how to make the following Gluten-Free Arrowroot crackers in the Gluten-Free Baking class in September at Nature’s Emporium.  But until then, you can try them out yourself. Here’s the recipe.

Arrowroot Crackers

1 tbsp ghee or clarified butter
1/2 cup light bean flour (like chick pea)
1½ cups arrowroot flour
1 cup  almond meal
2 tsp baking powder
1 tsp  salt with trace minerals
¾ cup purified water – warm
1 tbsp. honey
1 tsp  thyme
½ tsp  basil

Parchment paper
1 egg
1 tsp toasted sesame seeds or black onion seed
½ tsp dulse

 1.  Prepare the batter. Melt butter in a small dish in a low oven. In a medium-sized mixing bowl, mix flours, almond meal, baking powder, thyme, basil and salt. Mix warm water and honey and add to dry ingredients. Add melted butter, and stir, and then mix gently to form moist dough. Turn on oven to 300° F.
2.  Create the cracker. Place parchment paper onto a large bar pan. Press and stretch dough with your fingers into the pan, until dough is very thin – about 1/16th-of-an-inch. Roll with a small roller to help make it smooth. Glaze with a beaten egg, and evenly sprinkle on seeds and dulse. Cut five rows down and eight rows across to make 40 squares. Prick with fork to prevent bubbling.
3.  Bake 30 minutes or until crackers are crisp. Cool on a rack, and then lift parchment paper to slide crackers to a serving dish. Serve with your favorite  bean spread.
4.  Store in an airtight container, or in a tin with waxed paper, and refrigerate.

Hope you enjoy whipping up your own bean spreads with what you have in the pantry and frig!

Incoming search terms:

  • arrowroot crackers

Day 24 – Cooking with my Daughter

Posted April 25th, 2011 in Grains, Meatless, Recipes by Rebecca Lane

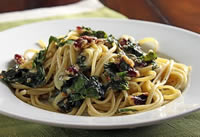
Walnuts, Swiss Chard & Port-Salute cheese with Noodles

Today is a very special day. For the first time in recent memory (we used to bake together often when she was younger), my teenager suggested that she make supper tonight. Who ever heard of such a thing?

And to make it even more exciting, she went exploring online and came up with a recipe that we made. Now, I’m going to come up with some suggestions to make it even better.

The original recipe came from Saveur but we’re adapting it.

Walnuts, Red Swiss Chard and Port-Salute Cheese on Soba Noodles
Serves 4

1 cup shelledwalnut pieces – with spices and maple syrup

  • 1/4 cup chili powder
    2 Tbsp sea salt
    1 Tbsp ground cumin
    1 Tbsp paprika
    1 Tbsp coriander
    1 Tbsp pepper
    1 tsp cinnamon
  • Mix the spices together and keep – makes enough for 5 batches of the roasted nuts
  • 2 Tbsp maple syrup
  • Roast walnuts in a single layer (on parchment paper) on a cookie sheet at 300°F for 20 minutes. Remove from oven and sprinkle with spice mixture and maple syrup. Stir thoroughly. Return to hot oven and let absorb liquid and dry the nuts – another 10 minutes.

1 bunch red swiss chard
2 Tbsp walnut oil
2 shallots, peeled and minced
3 large cloves garlic, peeled and minced
Zest of one lemon (save a little for garnish)
1/4 cup vegetable stock
Dulse and Freshly ground black pepper
8 oz Soba Noodles
4 oz Port-Salute cheese or other semi-soft cheese cut up into bits (you will need to refrigerate it in order to cut it up)

Trim swiss chard leaves, discarding tough stems. Chop coarsley and set aside.

Heat walnut oil in a medium skillet over medium-low heat. Add shallots and garlic and cook until shallots are soft, stirring occasionally – about 7 minutes. Add the vegetable stock, lemon zest and swiss chard, season with dulse and pepper – cover and allow to wilt – about 5 minutes.

At the same time, cook the soba noodles in a large pot of boiling salted water for 8 minutes. Drain and return to pot. Stir in cheese and walnuts.

To serve, put pasta on a platter with the swiss chard, garlic and shallots on top. Garnish with a few of the toasted, spiced walnuts on top along with  lemon zest.

The Port-Salute cheese is very creamy and quiet. You could use any other semisoft cheese that you have on hand – one with more flavour might be nice to compliment the bitterness of the swiss chard.


I use the nut spice for walnuts and more often pecans. I keep the spiced nuts for a week in a mason jar – they don’t seem to last longer than that as they can be added to spice up a salad, a noodle bowl, pad thai – you name it, they make it taste better. At Christmas, you can even make up jars as presents for your friends.

Day 23 – Detox with Dandelions

Posted April 21st, 2011 in Detoxification, Recipes, Salads by Rebecca Lane

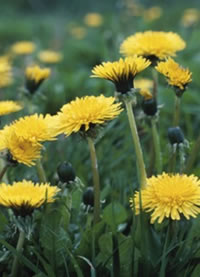
Dandelions for Spring Detox

Our gardens are full of beneficial weeds and flowers. This fresh salad
will have you getting up early to pick dandelions!

Dandelion root and leaves are often used to support the liver, kidney and breasts. The leaves are high in potassium which makes it a good diuretic and cellular detoxifier. They are best eaten in spring and fall when the weather is cooler – the roots can be dug out and used for root tea in the fall.

Here’s a short list of the benefits of dandelion (from Sat Dharum Kaur’s Healthy Breast Program):

  1. protect, heal and tonify the liver
  2. decrease breast congestion
  3. discourage cancer
  4. improve digestion and appetite
  5. cleanse the kidneys
  6. stimulate weight loss by improving metabolism
  7. protect the immune system by increasing interferon production
  8. promote the flow of bile to relieve the liver of its toxins

Dandelions also contain vitamin A, calcium, and iron. Remember to avoid eating dandelions that have been sprayed with pesticides.

Dandelion, Pear & Walnut Salad

1 bunch dandelion leaves
3 pears, chopped
½ cup walnut halves
1/4 cup dried cranberries

Dressing:
½ cup olive oil
1/4 cup pear juice (or apple juice)
Juice of ½ lemon
1 Tbsp maple syrup
1 tsp fresh ginger, grated
½ tsp Dijon mustard
1/4 tsp cinnamon
salt & pepper to taste

1. Blend dressing ingredients in a  jar. Cover with lid and shake well.
2. Pour over dandelion, greens, and  chopped pears (leave the skins  on for fibre).
3. Let sit for at least 10 minutes  to marinate (max. 2 hours).
4. Before serving toss with walnut halves and dried cranberries.
5. Top with blue cheese, sprouts, and seeds!

Day 22 – Cooking for the Rushed

Posted April 20th, 2011 in Meatless, Recipes by Rebecca Lane

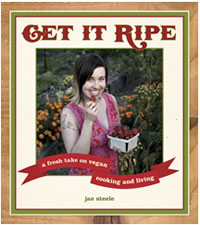
Get it Ripe by jae steele

Tonight has been one of those ‘taxi-service’ nights. Since 3:30 I have been ferrying children from one thing to the next. My husband is out of the country and I’m alone at home at dinner time. Sound familiar? When they finally get home they are going to be STARVING, but right now all is calm in the house.

So I’ve pulled out one of my old faithfuls from the freezer and am cooking up some Soba Noodles (buckwheat noodles – so tasty) and home-made vegan spaghetti sauce courtesy of Jae Steele’s book “Get it Ripe“. You can also serve it over roasted Spaghetti Squash which is delicious and top with nutritional yeast. I’ll include the directions for that in case you want to try.

If you want to make yesterday’s lasagna go further (and I did this), for the bottom layer you could use this sauce with a layer of baby spinach over top, then start with the cream sauce. The two sauces are delicious together and combine to make a rose.

Vegetable Tomato Sauce (from page 188, Get it Ripe)
3 Tbsp olive oil
2 medium onions
2 large cloves garlic, minced
8 oz mushrooms, slices
1 bell pepper, chopped
1 medium zucchini, chopped
1 28-oz can crushed tomatoes
1 Tbsp fresh oregano
1 Tbsp fresh basil
1 Tbsp fresh rosemary
1 tsp sea salt

Heat oil in a 3-qt saucepan on medium heat. Add the onions and saute for about 8 minutes until softened and fragrant. Add garlic and mushrooms and saute for another 5 minutes. Add the bell pepper and zucchini and saute for another 5 minutes (I sometimes add grated carrots too to sweeten it up).

Pour in crushed tomatoes and reduce heat to simmer. Stir in fresh herbs and salt and simmer for 20 to 60 minutes – the longer the better the flavours mix together.

You can make the tomato sauce as the Spaghetti Squash is roasting. Cut squash in half, scrape out seeds and pulp and discard (or separate the seeds and toss them with salt and roast in a separate pan until golden). Place cut side down on a piece of parchment paper. Trust me you want the parchment paper, or you’ll be making a trip to buy another baking pan (I know from experience)! Roast for about 40 minutes at 375°F. You can rub 1 Tbsp of oil over the squash but not necessary.

Remove from the oven and let cool just a bit. Then, holding the squash in your oven mit covered hand, take a fork and scoop flesh into a colander to drain. 

Serve the squash covered with the tomato sauce and garnish with Parmesan cheese or nutritional yeast and fresh pepper.  A caesar salad would be a tasty side dish to accompany this salad.

I find that this is enough for two days – I serve half the first day and pour the rest into a mason jar to freeze for another day. My family likes it best if I puree the sauce so there are no “chunks” – you may be able to get away with the chunks!

Day 21 – working with my new Vita-Mix

Posted April 19th, 2011 in Meat in, Recipes by Rebecca Lane

The morning didn’t go as I had hoped. My teenage daughter often goes off to school without breakfast. As we all know, breakfast is the most important meal of the day. In order to be able to learn and process information, she needs to have vital nutrients and protein in her body. But she’s also a teenager – do I need to say more?

With my shiny new Vita-Mix I made her a smoothie, trying to find a middle point between her need for sweets and my need for her to get some nourishment before school. She had purchased a package of Proteins + Smoothie mix (orange cream flavour), so I thought I could use a scoop of that with ¾ cup of almond milk, ¼ cup of kefir (to get some healthy bacteria into her body) and her daily vitamins (which she rarely takes). Major fight! But she did drink half of it. Small steps.

I’m going to experiment with 1 cup frozen fruit mix, an orange, a banana, 2 carrots and a large handful of spinach. With some water to (1 cup) – and I’ll try adding some of my homemade kefir (1/2 cup) in too. I’ll let you know how it tastes! Delicious – much better than Emily’s smoothie. Tomorrow I’ll add some good flax seed oil (omega-3 essential fatty acid EFA). I would add it today, but I don’t have any right now. My friend and colleague, Sherri Doak, suggests that I add some New Zealand Whey Protein powder, so I’ll pick up some of that too.

Okay, for supper I’m trying something really different. And since it’s a lasagne, I’m going to make it in two pans so that I can freeze one of them for a day when life is crazy.

Lasagna with Roasted Asparagus, Turkey and Cheese Sauce – this recipe from the Holistic Cooking Academy

Accompany any pasta dish with a side salad of mixed baby greens. I’ll be using left-over kale salad from last night.

I’ve chosen to use fresh noodles tonight, you can use them without soaking, but I find that they are a little dry so I usually soak them in boiling water for 2-3 minutes. This dish has lots of steps so maybe it would be best to save for the weekend or an evening when there isn’t a lot going on.

Creamy Chives Sauce (makes about 4 ½ cups)
3 Tbsp butter
3 Tbsp flour
2 cups milk (I’ll use almond milk)
½ cup coconut milk
1 cup ricotta cheese
1 Tbsp grated lemon rind
1/2 cup chives, chopped
2 tsp. kelp salt
Dash cayenne pepper

9 lasagna noodles
4 cups asparagus, trimmed and roasted
1 Tbsp olive oil
1 Tbsp freshly ground coriander
36 oz ground turkey, browned
2 cloves garlic, minced
1 cup Parmesan cheese, grated

Make the sauce. In a medium saucepan, on medium heat, combine melted butter and flour and stir together. Add milk gradually, stirring constantly and then add the coconut milk. Whisk constantly until it thickens (at the boil). Stir in ricotta cheese, lemon rind and chives. Season with salt and cayenne pepper. Set aside.

Preheat the oven to 375°F. Cut the asparagus into 2 inch pieces and toss with oil, salt and coriander. Place in a pyrex dish and roast for 6 minutes until hot and tender. Remove from heat and reduce oven heat to 350°F.

Brown the turkey and garlic with just a touch of oil. Oil a 9 x 13 x 2 inch dish and form the first layer with three lasagne noodles. Top with 1/3 of Creamy Chives Sauce and 1/3 cup Parmesan cheese and ½ of the turkey and asparagus. Layer once again, then on the top layer end with noodles and the remaining sauce and Parmesan cheese.

Bake for 30 minutes at 350°F or until bubbling.

Day 20 – Time to start something New!

Posted April 18th, 2011 in Meatless, Recipes by Rebecca Lane

Well, this point came much sooner than I had anticipated. I’ve already shared all of my family’s favourite meals, so now I have to start trying new recipes. This is good for me – stepping out of my comfort zone for the next 10 days could have some interesting results. Hopefully my family will like SOME of my creations!

To make things even more interesting, I purchased a Vita-Mix today and should be really shaking things up in the juicing department as soon as I can figure out how to set it up. Refresh cookbook has lots of ideas for juice combinations which I will be trying out over the next couple of days. Will keep you informed on how I sneak in kefir, protein powder, spirulina and other great healing aids – and what the family thinks of these healthy green drinks. Failing everything else, at least I will be eating well – because my taste buds seem to be much more interested in trying out new flavours than my teens.

So, what’s for dinner tonight you ask? Are you ready – cause it’s pretty exciting!

From the cookbook, Vegetarian Cooking for Everyone by Deborah Madison, we’re trying the Winter Squash Galette with a yeasted tart dough. It will be accompanied by a kale salad with mango (sweet flavours to compliment the squash) and a Quinoa with red peppers, leeks and carrots. I have a couple of hockey boys sleeping over tonight so I need filler food! I’ve also got a couple of steaks to BBQ in case they’re still starving.

Yeasted Tart Dough with Olive Oil

2 tsps active dry yeast
1/2 tsp sugar
1/2 cup warm water
3 Tbsp olive oil
1 egg, lightly beaten
3/8 tsp salt (have you ever heard of such a thing? I didn’t realize that I had a 1/8th tsp measure)
1 3/4 cup flour, as needed (I’m using whole spelt flour tonight)

Dissolve the yeast and sugar in the water in a medium bowl and let stand until bubbly, about 10 minutes. Add the oil, egg and salt, then stir in flour. When the dough is too stiff to work with a spoon, turn it onto the counter and knead until smooth and elastic, about 4 minutes.

Add more flour if necessary to keep it from sticking.

Set the dough in an oiled bowl, turn it over to coat, cover with a damp towel and let rise until doubled in bulk, 45 minutes to 1 hour.

Winter Squash Galette

Yeasted Tart Dough recipe
2 1/2 lbs winter squash (I used butternut)
1 small head garlic, cloves separated but not peeled
1 Tbsp olive oil, plus extra for the squash
1 onion, finely diced
12 fresh sage leaves, chopped, or 2 tsp dried
1/2 cup freshly grated parmesan cheese
Salt and freshly milled pepper
1 egg, beaten

Make the dough. Preheat the oven to 375°F. Cut the squash in half, scrape out the seeds, and brush the surface with oil. Stuff the garlic into the cavities and place the squash cut side down on parchment lined sheet. Bake until flesh is tender, about 40 minutes. Scoop out the squash and squeeze the garlic cloves. Mash them together with a fork until fairly smooth, leaving some texture.

Warm 1 Tbsp oil in skilled over medium heat. Add the onion, and sage and cook until onion is soft and beginning to colour about 12 minutes. Add it to the squash with the grated cheese and season with salt and pepper.

Roll out dough into 14-inch circle and spread the filling over it, leaving a border of 2 inches or more. Pleat the dough over the filling, then brush the edges with beaten egg. Bake until the crust is golden, about 25 minutes.

I think this will be delicious with the salad. I’ll definitely add some maple syrup to the dressing and will make the salad while the squash is roasting so it can marinate for at least 2 hours.

NOTE: After making this tart, I suggest that you roll it out on either the cookie sheet or pizza stone that you intend to bake it on. It is impossible to move when full. Another suggestion – to make this tart faster, you could use a phyllo pastry crust. This crust is quite doughy, more like a pizza crust.

Day 18 – the final 3 detox pathways

Posted April 16th, 2011 in Detoxification, Meatless, Recipes by Rebecca Lane

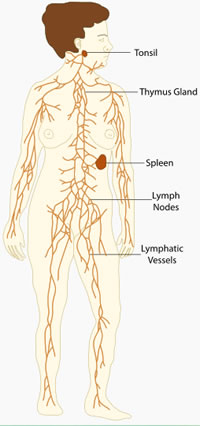
Lymphatic System

Yesterday didn’t go so well. I’m blessed to have cleaning ladies here every two weeks and they turn my house from chaos into calm in 2 to 3 hours. It’s a minor miracle and I love them. However, when they were cleaning my office yesterday they accidentally tweaked a chord and my screen died. It took me the rest of the day to figure out what had happened and by the time I did, it was time for bed! I’ll know for next time.

Anyway, I didn’t get around to writing a blog post and several other things. However, I did experiment with a new recipe which you’ll see at the bottom of this post and I think you’ll be glad that I cooked instead of typed!

Today we’re going to look into the last three detoxification pathways of the body – the white blood cells, the lymphatic system and the spleen.

The white blood cells
White blood cells, or leukocytes, are cells of the immune system involved in defending the body against both infectious disease and foreign materials. Five different and diverse types of leukocytes exist, but they are all produced and derived from a stem cell in the bone marrow.

The function of white blood cells is to digest and break down all foreign elements including toxins, dead cells, cellular wastes, bacteria and impurities in the blood. In order to fulfill this role, they congregate in the lymphatic tissues (the lymph nodes, spleen, thymus gland) and in special clean-up sites in the liver and small intestine.

The number of WBCs in the blood is often an indicator of disease. There are normally between 4×10⁹ and 1.1×10¹⁰ white blood cells in a litre of blood, making up approximately 1% of blood in a healthy adult. An increase in the number of leukocytes over the upper limits is called leukocytosis, and a decrease below the lower limit is called leukopenia. (Source: http://en.wikipedia.org/wiki/White_blood_cell)

Many vitamins, minerals and herbs can activate these white blood cells to serve us better:

  • Vitamin C helps your body create white blood cells. Consume 250 mg  daily from citrus, strawberries, melon, tomatoes, green leafy vegetables, papaya, mangoes, broccoli, potatoes, cabbage, green and red peppers, rose hips and the herb amla.
  • Zinc contributes to the formation of white blood cells and is part of the enzymes that repair your skin and allow your wounds to heal. Consume 20 mg of zinc daily from pumpkin seeds, sunflower seeds, almonds, walnuts, garlic, turnip, split peas, potatoes, lima beans, seafood, mushrooms, eggs, wheat germ.
  • Vitamin A aids in the synthesis of a specific white blood cell called a lymphocyte. Lymphocytes directly attack foreign invaders and help your immune system produce antibodies, which attack potentially harmful substances and protect your body from infection. Adults should consume 5000 IU daily. The best sources of vitamin A include butter, cream, egg yolks, fish liver oil from cod, salmon, halibut.
  • Vitamin D decreases the rate at which white blood cells are destroyed and removed from your body. This decreased rate of destruction does not affect the rate at which white blood cells are created, however. Instead, the decreased destruction rate allows your body to increase its white blood cell count, increasing your immune system’s ability to fight off infections. Adults require 800 IU of dietary vitamin D every day, depending on their age and sunlight exposure. Dietary sources of vitamin D include fortified milks (dairy, soy, rice, almond) and fish oils. (Source: http://www.lef.org/)
The lymphatic system
The lymphatic system is the part of the immune system comprising a network of conduits called lymphatic vessels that carry a clear fluid called lymph unidirectionally toward the heart.
This is the body’s sewage system, draining toxins from every corner of the body and because of its physical proximity to many tissues of the body, it is the system responsible for carrying cancerous cells between the various parts of the body. The intervening lymph nodes (full of filters and lymphocytes) can trap the cancer cells. If they are not successful in destroying the cancer cells the nodes can become inflamed and may become sites of secondary tumors.
A healthy immune system requires that the lymphatic system is draining freely and not overloaded with toxins. The vitamins and minerals outlined above to support the leukocytes are critical for the immune system. Other techniques that assist lymphatic circulation include:
  • lymphatic drainage massage techniques can be practiced (there are specially trained RMT in your area),
  • exercise is critical because it keeps all of the bodily fluids circulating optimally – rebounding on a small trampoline is especially beneficial – focus on movement of the arms, armpits and chest
  • dry brush massage (using a long-handled, natural bristle brush, brush in a circular motion towards your heart over every part of your body starting with the soles of your feet) in the morning when you arise,
  • alternating hot and cold showers,
  • going braless (see blog post on my experiment).

The spleen
Located behind and slightly below the stomach, the spleen is a fist-sized organ filled with macrophages which are white blood cells whose function is to digest bacteria, foreign particles and old red blood cells.

The spleen is a powerful filter of blood poisons (it is the largest mass of lymphatic tissue in the body) and can store blood for us to be released as we need it. Blood purifying herbs activate the macrophages and help them to do their job of devouring toxins. These include burdock root, goldenseal and echinacea.

The white blood cells in the spleen can be compromised by stress and periods of relaxation are essential. Sugar and excessive sweets are recognized as harming the spleen. Limit the use of ALL sugars.

I hope that you have found the information this week on the detoxification pathways to be very interesting and helpful in your understanding of the healing powers within our bodies. Now on to the delicious part of the blog – supper!

Pumpkin Gnocchi (from Canadian Living, Comfort Foods 2011)

This takes 1/2 an hour to prepare, so Saturday is the perfect day to prepare this dish that everyone can help with.

2 cups roasted pumpkin puree (I used a can of pumpkin puree this time – but have made using a roasted butternut squash)
1/2 cup finely grated Parmesan cheese
1 egg
1 tsp salt
1/4 tsp ground nutmeg
3 cups spelt flour (next time I’ll try making this gluten-free with some chick pea flour)

In a large bowl, stir together pumpkin, cheese, egg, salt and nutmeg. Using wooden spoon, stir in 2 cups of flour, Stir in enough of the remaining flour, 1/4 cup at a time, to make soft, sticky dough that pulls away from bowl but still sticks to spoon and fingers.

On well-floured surface and with floured hands, roll dough into a log – divide into quarters. Gently roll and shape each quarter into 3/4 inch diameter rope. With sharp, floured knife, cut each rope diagonally into 3/4 inch pieces.

In large pot of boiling, salted water, cook gnocchi in 2 batches. Stir gently until they start to float (they literally pop up to the surface) – takes about 3 minutes. Using slotted spoon, scoop onto large serving platter.

Meanwhile, make the spinach basil pesto – this is a standard in my house. I make up a big batch and freeze it in ice-cube trays. Then its an easy pasta topping after school or on the run.

Spinach Basil Pesto (Refresh, p. 105)

2 cloves garlic, minced
1 tsp salt
1/4 cup sunflower seeds
1/3 cup pine nuts
3 Tbsp olive oil
1 bunch fresh basil, stems removed
2 cups chopped baby spinach

Blend the garlic, salt, pine nuts, sunflower seeds and olive oil in a blender until smooth. Mix in the fresh basil and spinach and pulse until smooth.
To serve, you can either put a dollop on top of the gnocchi – but it’s room temperature, so I usually toss the gnocchi in the pesto sauce and serve with a sprig of basil on top and some grated Parmesan cheese and pepper.